After CCBill Billing plugin is installed go to plugin configuration page. There you will see the form you should fill in to connect with your CCBill merchant account:
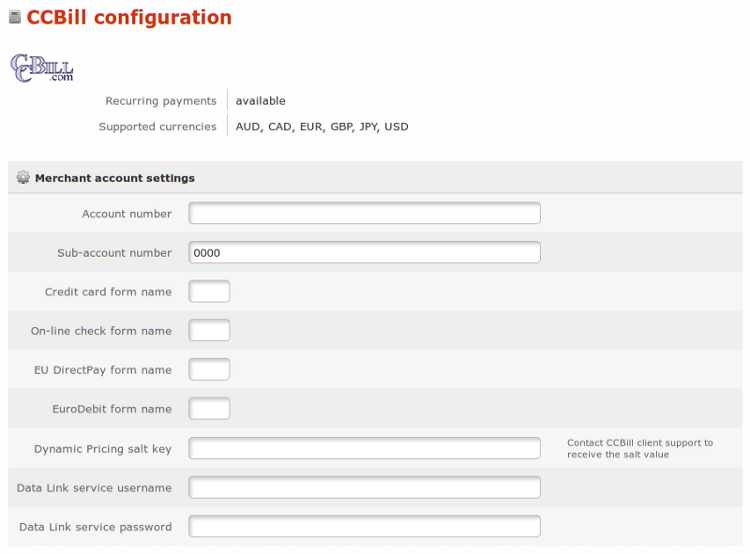
Form required fields are explained below.
Account number – your CCBill account ID
Sub-account number – usually 0000 is used
Credit card form name, On-line check form name, EU DirectPay form name, EuroDebit form name - form names for different payment types. You will get values for these fields after creating different payment forms in you CCBill account.
To create a payment form you need:
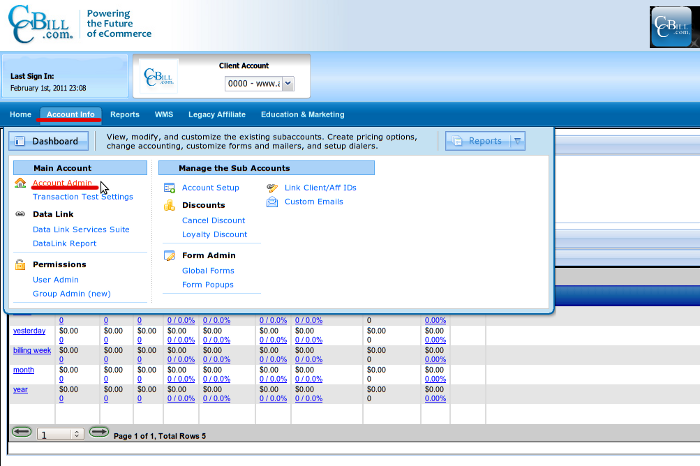
- Login to your CCBill account.
- Click the 'Account Info' button in the main menu, and then go to 'Account Admin'.
- Click the 'Form Admin' link in the menu on the left. This will open the 'Form Library'.
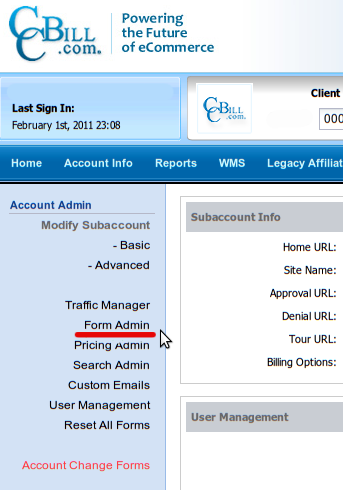
- Click the 'Create New Form' link in the menu on the left.

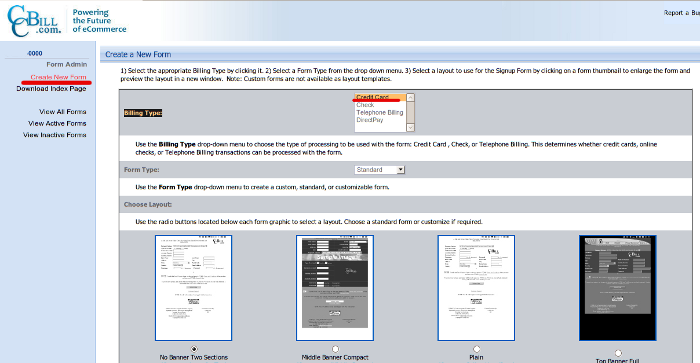
Select one of the available options in the Billing Type field, and click the 'Submit' button.
Dynamic Pricing salt key - contact CCBill client support to receive the salt value
Data Link service username and Data Link service password – you should create a Data Link user to get values for these fields
- Click the 'Account Info' button.
- Click the 'Data Link Services Suite' link.
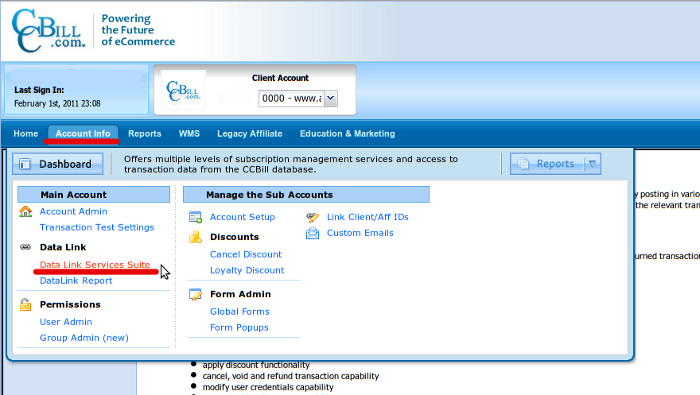
- Click the 'Add User' button in the menu on the left.
- Fill in the form. Enter your server IP address in the 'Valid Ips' field.
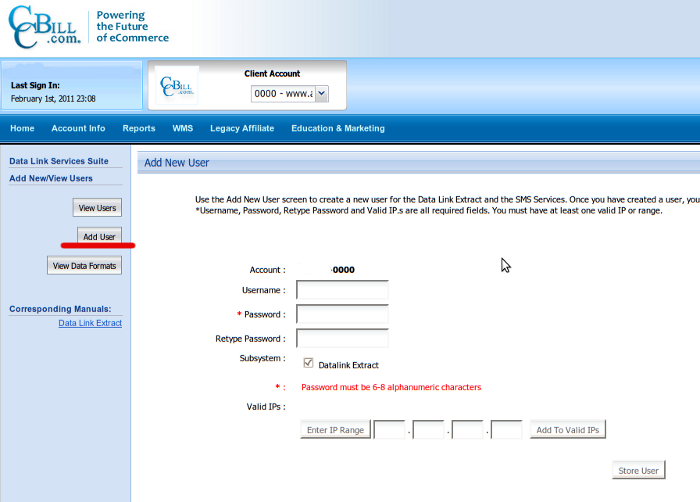
- Enter the username and password you use when creating the Data Link user for the Data Link service username and Data Link service password fields in your site Admin Area.
After that, you need to indicate the correct setting in this section: Modify Subaccount -> Basic
- you need to indicate your Site name
- you need to indicate as <b>Approval URL</b> the URL, where user will be redirected to after successful transaction. As a rule, this your website main URL: http://www.mysite.com/
.JPG)
The last step of CCbill account setup is entering the Approval Post URL as shown on the screenshot.
- Click the 'Account Info' button in the main menu.
- Go to the 'Account Admin' section.
- Click the 'Advanced' link in the menu on the left and enter your website URL. For example:
http://www.my-sitename.com/billing_ccbill/order/postback/
Make sure the URL is valid and does not make any redirects to another location. Note: incorrect Approval Post URL will result in possible POST data loss
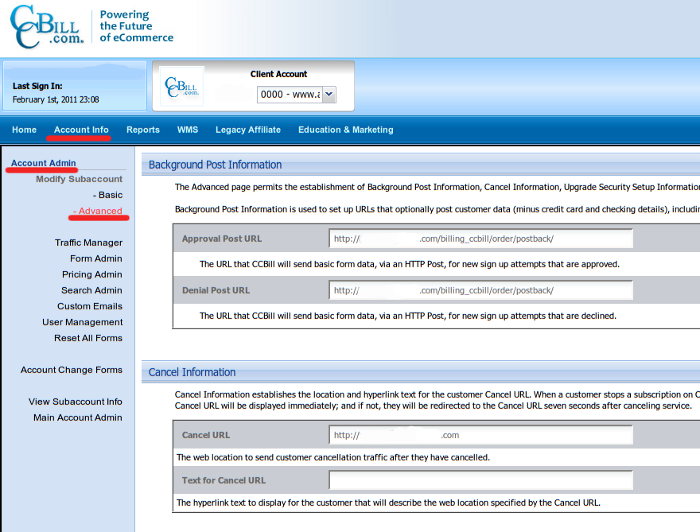
Please, make sure that Approval Post URL and Approval URL start with the same domain name which is in the config.php file.
